This manual applies to Windows Server 2012 and describes how to configure Network Load Balancing cluster for web servers.
Consider you have following server setup:
- DEV-WEB1 – IIS Web Server
- DEV-WEB2 – IIS Web Server
And following hostnames configured at DNS server:
- DEV-WEB1: 192.168.7.11
- DEV-WEB2: 192.168.7.17
- DEV-WEB: 192.168.7.31
DEV-WEB is a virtual host accessible from the Internet, configure your network Firewall to allow 80 and 443 ports on that host.
DEV-WEB1 and DEV-WEB2 80 and 443 ports should not be available from the outside.
Installing NLB
- Connect to DEV-WEB1 via Remote Desktop.
- Start Server Manager Dashboard application and select Add Roles and Features from Manage menu:

- In Features tab of Add Roles and Features Wizard check “Network Load Balancing” and click Install button:

- After installation is complete a server restart might be required.
- Repeat steps 1-4 for DEV-WEB2 server.
Configuring NLB
- Connect to DEV-WEB1 via Remote Desktop.
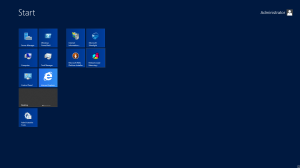
- Start Network Load Balacing application from Start menu:

- Select New from Cluster menu:
- Input dev-web1 in Hostname field and click Connect and then Next:

- New Cluster : Host Parameters window will show up. Click Next:

- Click Add… button in New Cluster : Cluster IP Addresses window:

- Enter cluster IP address (DEV-WEB host IP address) and click OK:

- Verify that correct IP address has been added and click Next:

- In New Cluster : Cluster Parameters window enter full Internet host name from which web cluster should be accessible (for example dev-kps-web.kps.local or www.yourcompany.com):
 Leave default value of Cluster operation mode – Unicast and click Next.
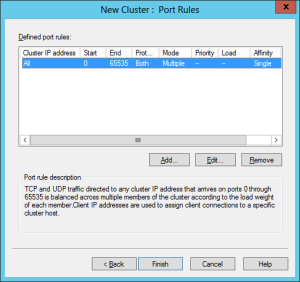
 - In New Cluster – Portal Rules window click Edit button to edit default port rule:

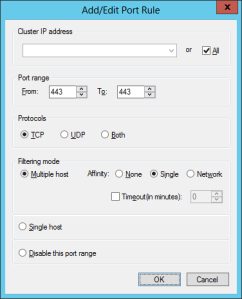
- Change port range from 80 to 80, select protocol – TCP, select affinity – Single and click OK:
 More information on NLB affinity is available on MSDN: http://technet.microsoft.com/en-us/library/bb687542.aspx. In short Single NLB affinity configures cluster to associate web clients to particular server. For example, when user A will open dev-web page, cluster will assign a user to the server dev-web1 and all ongoing requests from user A will be processed on dev-web1 server.
 - Click Add… button to configure SSL port and set Port range from 443 to 443, select protocol – TCP, select Affinity – Single and click OK:

- Review that 80 and 443 ports are correctly configured and click Finish:

- Network Load Balancing Manager will start configuring a cluster. Please, note, that your connection to server might be lost for a few moments, because of Network Interface reconfiguration (additional IP address is added):

- After all pending operations are complete, select Add Host from Cluster menu. Add Host to Cluster wizard will show up.
- Input second web server host name (dev-web2) in Host field, click Connect and Next:

- In Add Host to Cluster : Host Parameters step click Next:

- In Add Host to Cluster – Port Rules step verify that 80 and 443 ports are correctly mapped and click Finish:

- After cluster pending operations are complete your cluster is setup and ready for use:

- Verify your cluster operation by going to your cluster hostname (dev-kps-web.kps.local in our case):
 You can see IIS HTTP 403 error response page meaning that request was passed to one of two cluster web servers.
In case you have more than 2 web servers, you may repeat steps 16-19 for all your dev-webN servers.